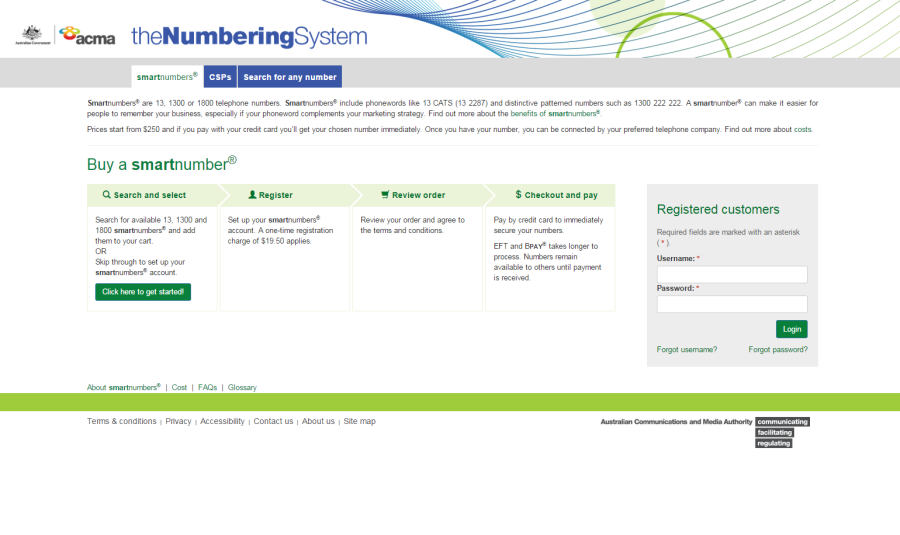
Select the smartnumbers tab in the Numbering system.
This topic describes how to:
Select the smartnumbers tab in the Numbering system.
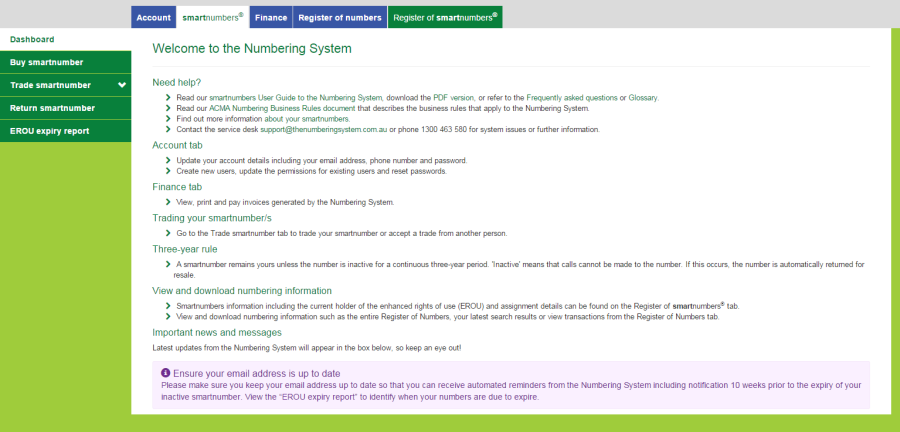
Login with your username and password in the Registered customers box. The smartnumbers Dashboard will displays.
Select the Register of numbers tab. The 'Search for any number' page will display.
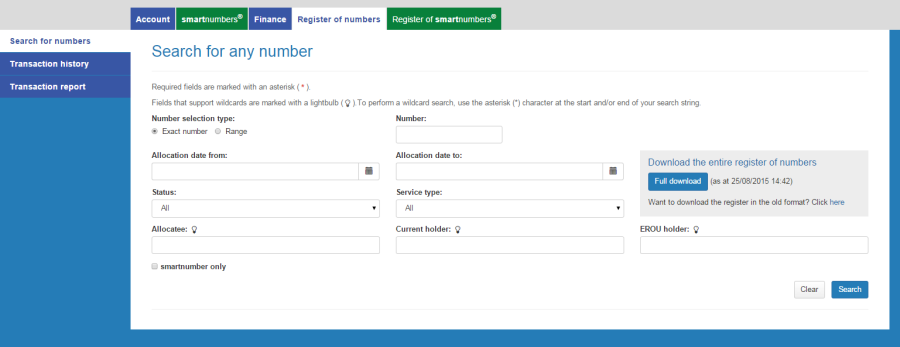
The 'Search for any number' page enables you to:
Select the Exact number option for Number selection type.
Type the number in the Number box.
Click on Search. The search results will display showing the number along with its details.
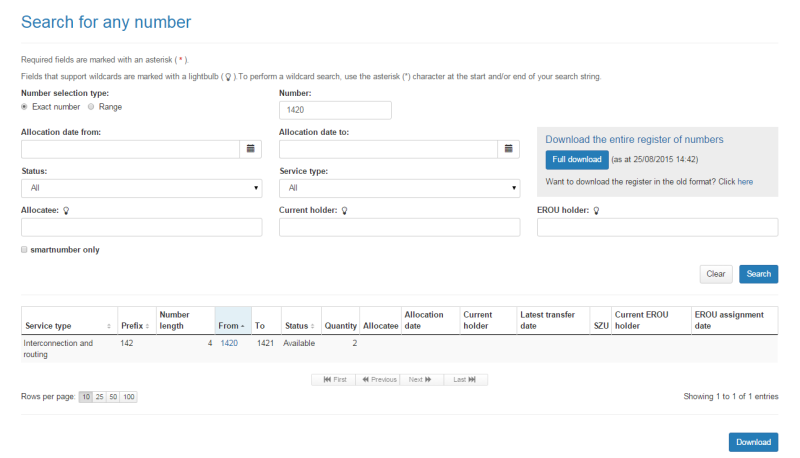
Note: If multiple rows are displayed, click on Next to navigate through them. You can also change the number of rows displayed per page to 25, 50 or 100. You can also sort by column headers.
Select the Range option for Number selection type.
Type the start of the number range in the Number from box and the end of the number range in the Number to box.
Click on Search. The search results display showing the numbers in the range selected along with their details.
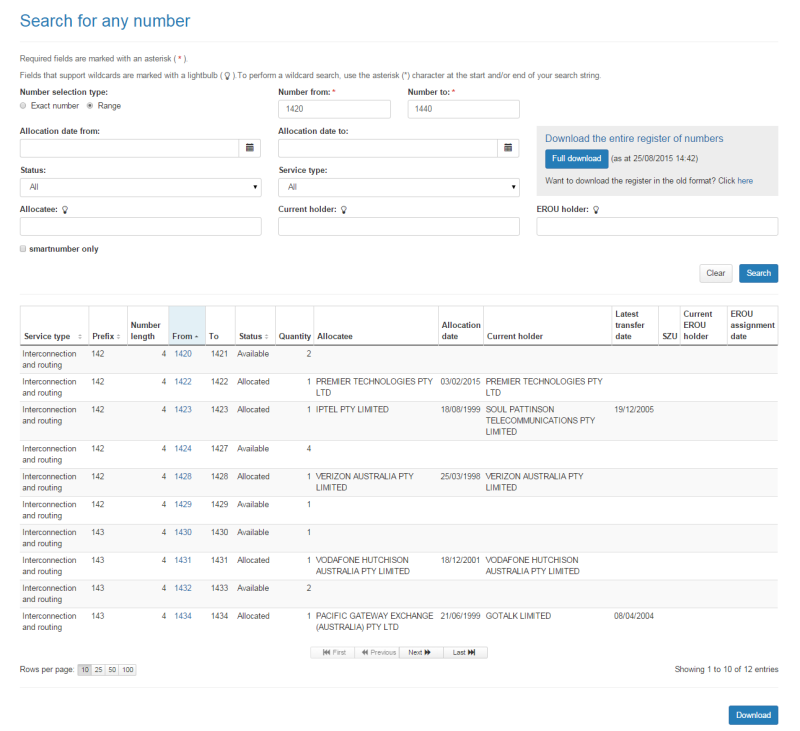
Note: If multiple rows are displayed, click on Next to navigate through them. You can also change the number of rows displayed per page to 25, 50 or 100. You can also sort by column headers.
To download your search results in an Excel spreadsheet, click on Download. Your browser's download dialog box will display.
Click on OK or Open depending on your browser. The .csv file will save via your browser and can be opened in Excel.
Use any combination of filters for searching:
To filter by smartnumber only: tick the smartnumber only check box.
To filter by a date range within which a number was allocated: enter the date range using the Allocation date from calendar and Allocation date to calendar.
To filter by number status: select a number status from the Status dropdown menu, either Spare, Allocated or All by default.
To filter by service type: select the service type from the Service type dropdown menu. The menu contains a comprehensive list of services — select one to search for numbers within that service.
To filter by allocatee: type an allocatee name in the Allocatee box.
To filter by a current holder: type a holder name in the Current holder box.
To filter by EROU holder: type the EROU holder name in the EROU holder box.
Note: To display all numbers within the selected filtering leave the Number box blank.
Click on Search. The search results display the filtered numbers and their details.
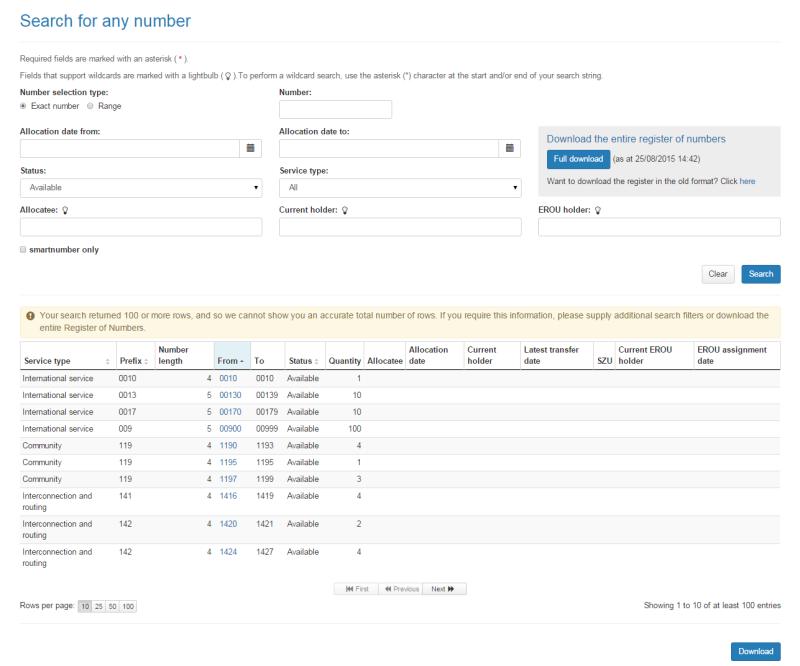
Note: If multiple rows are displayed, click on Next to navigate through them. You can also change the number of rows displayed per page to 25, 50 or 100. You can also sort by column headers.
To download your search results in an Excel spreadsheet, click on Download. Your browser's download dialog box will display.
Click onOK or Open depending on your browser. The .csv file will save via your browser and can be opened in Excel.
Select the smartnumbers tab in the Numbering system.
Login with your username and password in the Registered customers box. The 'Dashboard' page will display.
Select the Register of numbers tab. The 'Search for any number' page will display.
Click on Full download. Your browser's download dialog box will display.
Click on OK or Open depending on your browser. The .zip file will save via your browser and be unzipped and opened in Excel.
Select the smartnumbers tab in the Numbering system.
Login with your username and password in the Registered customers box. The 'Dashboard' page will display.
Select the Register of numbers tab. The 'Search for any number' page will display.
Select the Transaction history tab. The 'Transaction history' page will display.
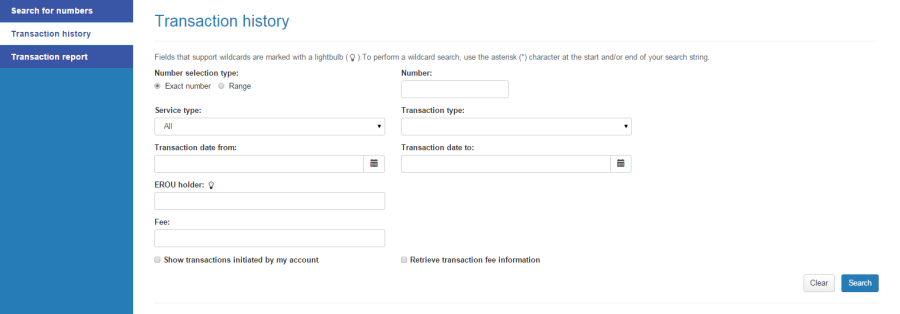
The 'Transaction history' page enables you to:
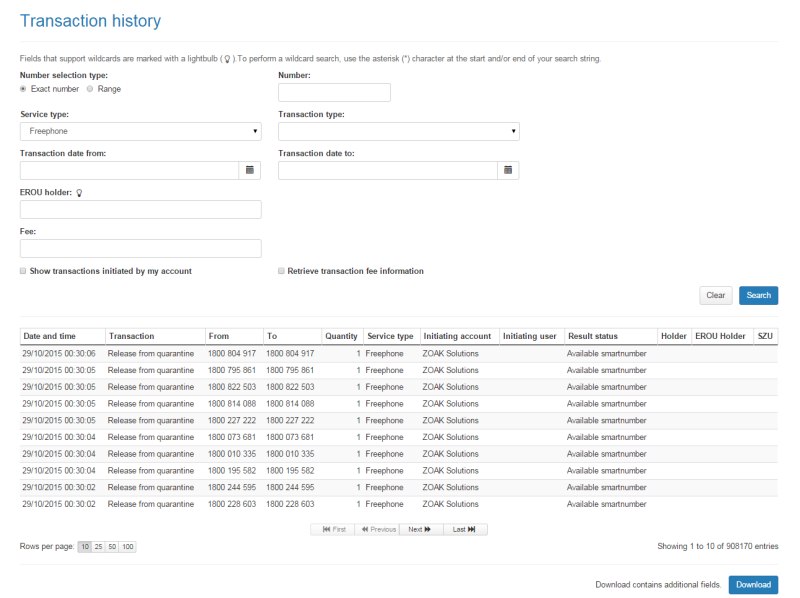
Select the Exact number option for Number selection type.
Type the number in the Number box.
Click on Search. The search results will display the number's transaction history details.
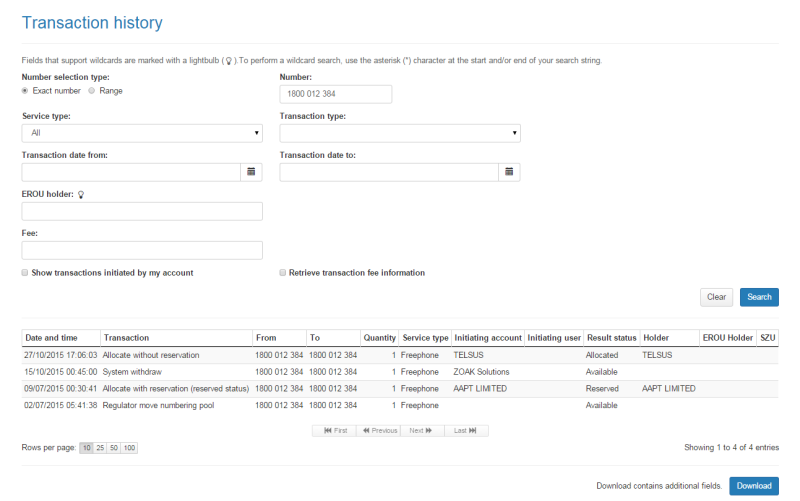
Note: If multiple rows are displayed, click on Next to navigate through them. You can also change the number of rows displayed per page to 25, 50 or 100. You can also sort by column headers.
To download your search results in an Excel spreadsheet, click on Download. Your browser's download dialog box will display.
Click on OK or Open depending on your browser. The .csv file will save via your browser and can be opened in Excel.
Select the Range option for Number selection type.
Type the start of the number range in the Number from box and the end of the number range in the Number to box.
Click on Search. The search results display the transaction history details of the numbers in the range selected.
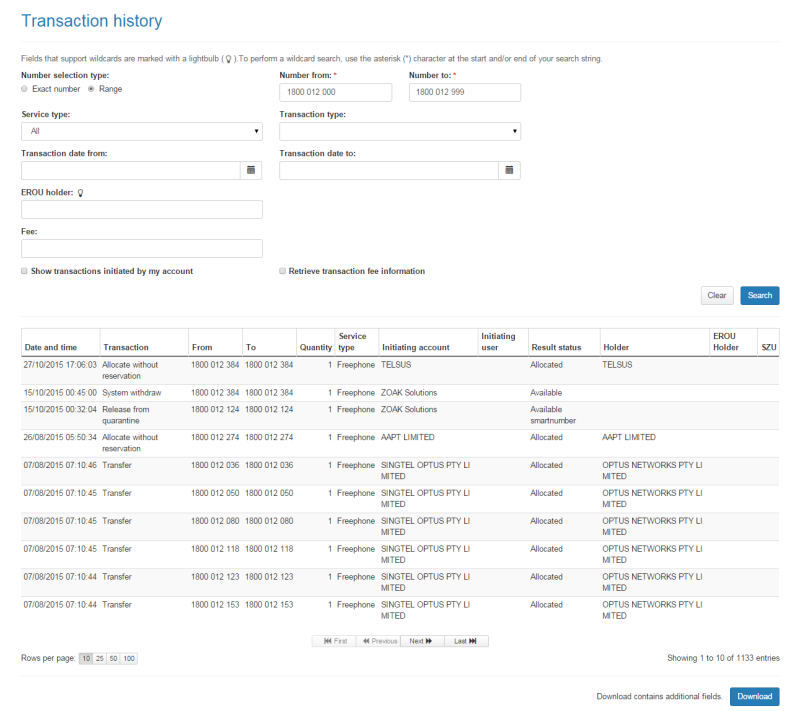
Note: If multiple rows are displayed, click on Next to navigate through them. You can also change the number of rows displayed per page to 25, 50 or 100. You can also sort by column headers.
To download your search results in an Excel spreadsheet, click on Download. Your browser's download dialog box will display.
Click on OK or Open depending on your browser. The .csv file will save via your browser and can be opened in Excel.
To filter by smartnumber only: tick the smartnumber only check box.
To filter by a date range within which a number was allocated: enter the date range using the Allocation date from calendar and Allocation date to calendar.
To filter by number status: select a number status from the Status dropdown menu, either Spare, Allocated or All by default.
To filter by service type: select the service type from the Service type dropdown menu. The menu contains a comprehensive list of services — select one to search for numbers within that service.
To filter by allocatee: type an allocatee name in the Allocatee box.
To filter by a current holder: type a holder name in the Current holder box.
To filter by EROU holder: type the EROU holder name in the EROU holder box.
Note: To display all numbers within the selected filtering leave the Number box blank.
Click on Search. The search results display the filtered numbers and their details.
Note: If multiple rows are displayed, click on Next to navigate through them. You can also change the number of rows displayed per page to 25, 50 or 100. You can also sort by column headers.
To download your search results in an Excel spreadsheet, click on Download. Your browser's search download dialog box will display.
Click on OK or Open depending on your browser. The .csv file will save via your browser and can be opened in Excel.